Tuesday, November 6, 2012

Thanksgiving Cake Bites!


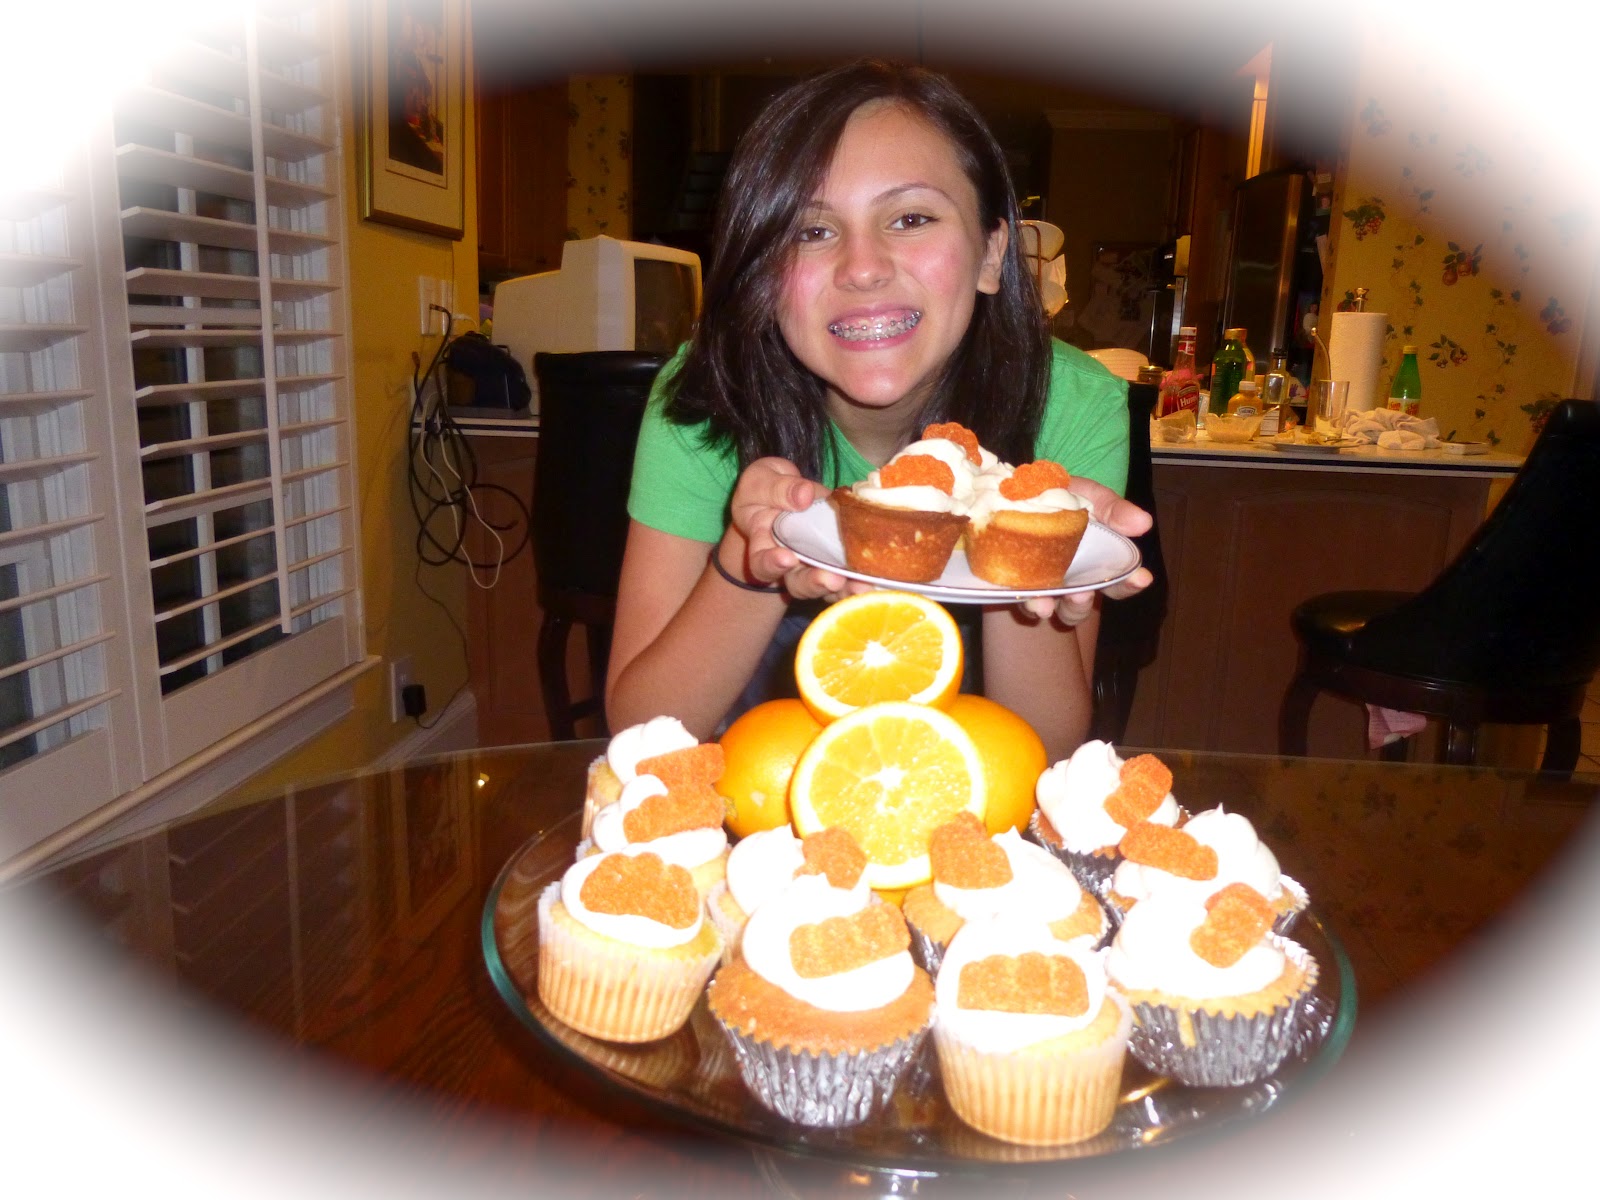
With Thanksgiving sixteen days away, I'm overjoyed. Thanksgiving is one of my favorite holidays!  I've already started making plans for the Thanksgiving menu! I wanted to try something a little different this year as far as the desserts go. A pumpkin flavored dish is an essential Thanksgiving favorite, but I wanted to stray away from the traditional pumpkin pie. I decided to get creative and was consumed with the idea of  making pumpkin cake bites! I tried the recipe this weekend and my family loved them! The cake bites weren't messy so I could carry them along with me to family members' houses without worries. They're very easy to travel with, perfect for those who are going away for Thanksgiving and want to bring along a dish! I hope you enjoy!

Pumpkin Cake:
-2 cups of cake flour
-1/2 cup of sugar
-1/2 tsp. of baking powder
-1/2 tsp. of baking soda
-1/2 tsp. of salt
-1/2 tsp. of cinnamon
-1/2 tsp. of nutmeg
-1/2 tsp. of ginger
-1 cup of pumpkin puree
-1/2 cup of buttermilk
-1 egg
-2 tbsp. of vegetable oil

Cream Cheese Frosting:
-12 oz. of room temperature cream cheese
-6 tbsp. of butter
-1/2 tsp. of vanilla extract
-1 cup of sifted confectioners' sugar

Coating:
-6-8 bars of white chocolate ( I used Ghirardelli.)

I included pictures as I made the cake bites to be as clear as possible. I hope the visual aid is helpful!
Preheat oven to 375 degrees Fahrenheit.

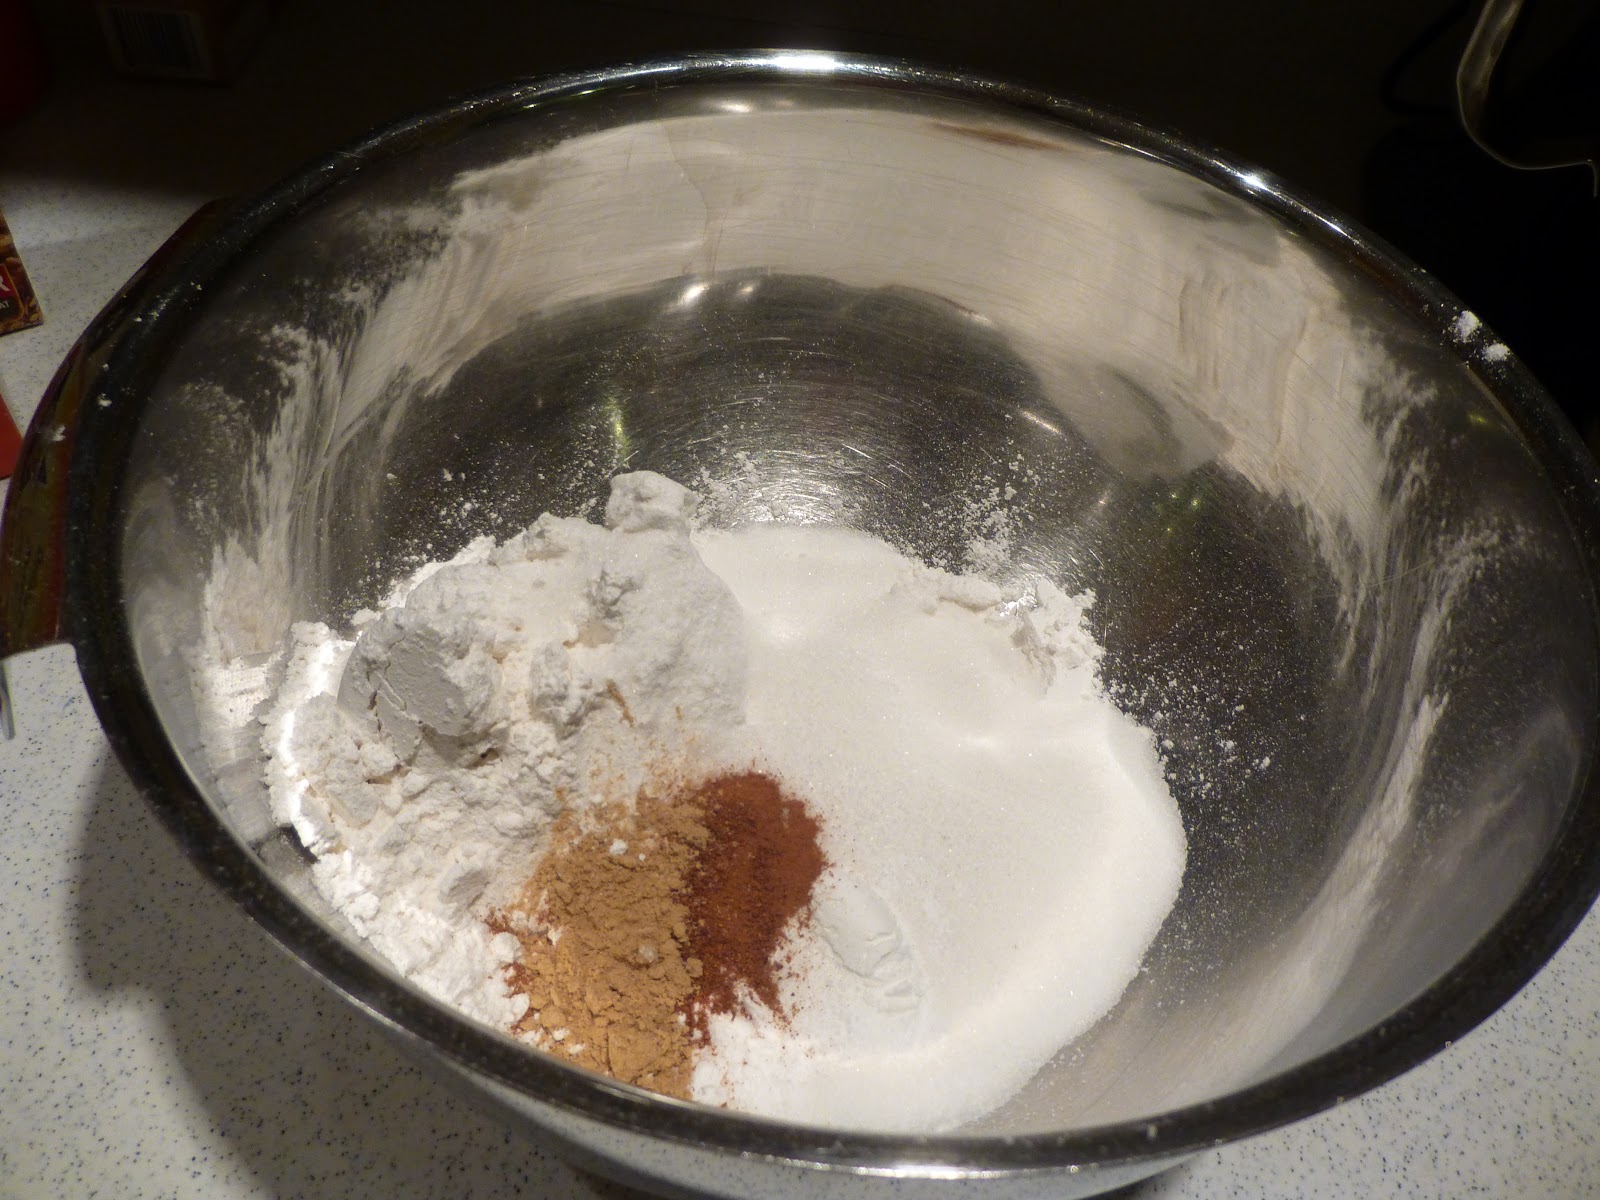
Combine the dry ingredients for the pumpkin cake.
Mix well.
 Whisk the buttermilk, egg, and oil.
 Whisk the pumpkin in with the wet ingredients.
 Fold the pumpkin mixture into the dry ingredients.
 Be careful not the overmix.
 Transfer the batter to the cake pan of your choice.
 Bake for about 20 minutes, or until an inserted toothpick comes out clean. Let cool.
 After cake has cooled, transfer cake to a large bowl.
 Crumble cake. ( I used my hands.)
 Add *cream cheese frosting( see bottom of page.)
 Work the frosting into the cake crumbles, distribute frosting evenly.
 Form cake mixture into balls and place on a baking sheet lined with parchment paper. Place in the refrigerator for an hour or until bites are firm.
 Chop chocolate into small squares and place in a metal, heatproof bowl over simmering water.
 Stir chocolate until it's melted and smooth.
 Place the cake bite into the chocolate and roll over until the cake bite is covered in chocolate.
 After the cake bite is covered, place in regular cupcake holders and let cool.
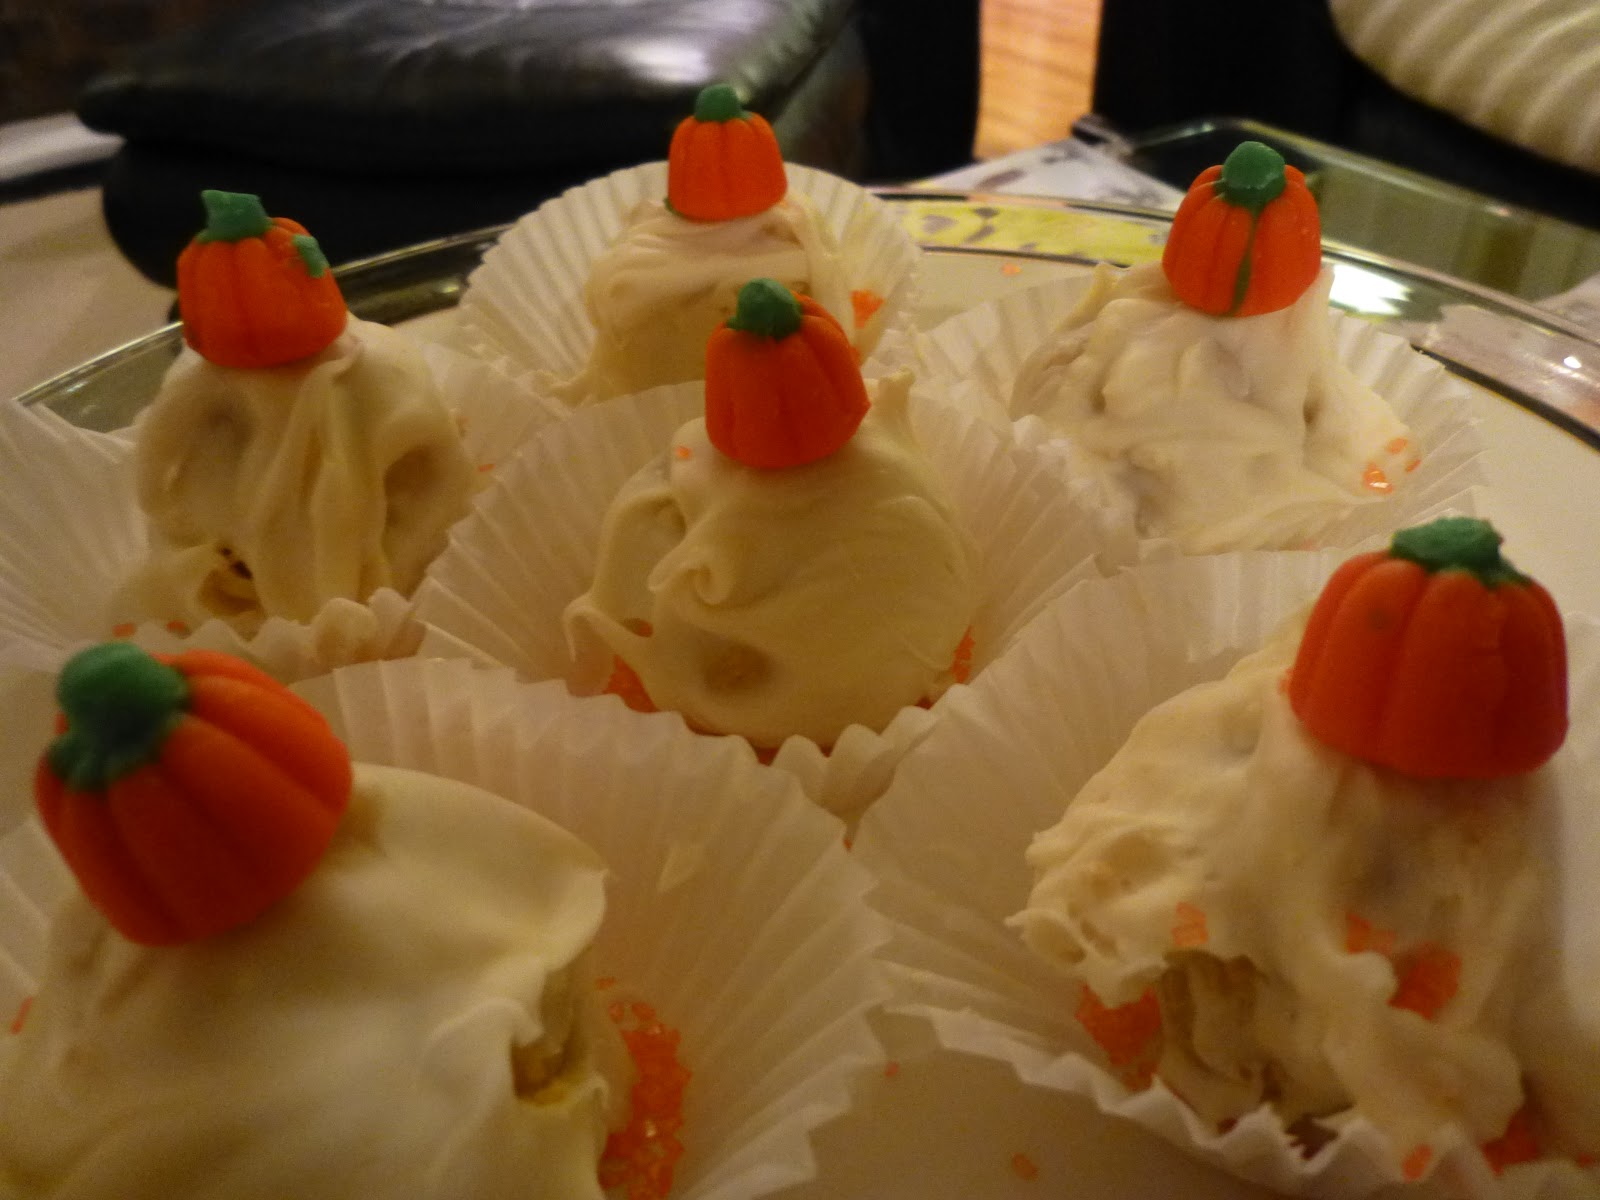
 Decorate with festive candy! Enjoy!


*Cream Cheese Frosting:
1) In a bowl with an electric mixture, beat the cream cheese, butter, and vanilla until smooth and fluffy.
2) Gradually beat in sifted confectioners' sugar.
3) Continue to beat until the sugar is incorporated and the frosting is light and fluffy.

Friday, September 7, 2012

Fall Brownies!

Fall Brownies drizzled with caramel sauce and edible leaves for garnish!

I like close up pictures :)

These were mouthwatering when they were warm and gooey!


The ingredients I used.

This is the pan of boiling water I used to melt the chocolate and butter over.

Melting the chocolate and butter.

Whisking the sugar and egg!

Melting the sugar for the caramel sauce.

The caramel sauce after it was finished. 

The brownies when I took them out of the oven.

The leaves I used for garnish! They really added a touch of autumn to these brownies!


 Technically the season of Fall doesn't start until September 22, but I'm eager for my favorite time of the year, so I baked, "Fall Brownies", ahead of the seasonal schedule. :) When September rolls around, normally everyone comes to the realization that summer has truly come to an end. School kicks back in for everyone, whether you're in elementary, middle, or high school, or even college. All employees are returning from their summer vacations, people start to settle down, the leaves on the trees start to change colors, the air becomes crisper, and the night starts to encroach on us quicker than before. The shifts in color throughout nature, and the change in atmosphere dealing with daily life, inspired me to create a "Fall Brownie." This is partially do to the fact that I associate brownies with autumn, and also that all the components used to make these," Fall Brownies," give off an aura that the season is near! They do this in appearance and taste! I hope you enjoy!

Fall Brownies

 Brownies:
(adapted from the cookbook, How to Bake.)
-2 ounces of unsweetened chocolate, chopped
-1 stick of unsalted butter
-2 eggs
-1 cup of sugar
-1/2 cup of all-purpose flour
-1 cup of peanut butter chips

Caramel Drizzle:
(adapted from the cookbook, Cupcakes.)
-1 1/2 cups sugar 
-1 1/4 cups heavy cream
- 1/4 tsp. of salt

Autumn Leaves:
*used for garnish*
( adapted from the cookbook, Cupcakes, Cookies & Pie, Oh My! The Candy Clay recipe.)
- 12 ounces of white chocolate chips
- 1/3 cup light corn syrup
- green sprinkles or yellow food coloring

To make the brownies...
1) Preheat oven to 350 degrees Fahrenheit.
2) Bring a pan of water to a boil. Remove from heat. Place a heatproof bowl over the pan of water with the chocolate and butter in it. Stir until butter and chocolate are melted. Remove from heat.
3) In a separate bowl, whisk together the eggs and the sugar until combined. Fold in the melted chocolate and butter, the flour, and the peanut butter chips. Stir together by hand.
4) Pour batter into a prepared brownie pan ( normally an 8-inch square baking pan), and place in oven for 19- 25 minutes, or until the brownies are puffed.

To make the Caramel drizzle...
1) In a saucepan over medium heat, melt the sugar for about 8 minutes, or until the sugar is melted and is dark golden yellow hue. Stir occasionally.
2) Remove sugar from heat. Pour the heavy cream into the sugar. The sugar will bubble when you perform this step. Mix in the cream and salt with the sugar.
3) Transfer caramel to a heatproof bowl and let it cool until usage.

To make the Autumn Leaves ( using Candy Clay )...
1) Place white chocolate chips in a heatproof bowl and microwave until melted. Make sure to stop the microwave about every 20-30 seconds and stir white chocolate chips to avoid them burning.
2) Add the corn syrup to the melted chocolate and mix in. 
3) Cover the bowl tightly with plastic wrap and and let it stand at room temperature for a minimum of 3 hours.
4) When ready for use, knead the clay until it becomes warmer and easier to handle. Add desired amount of green sprinkles or yellow food coloring to clay. Continue to knead until desired color is evenly spread throughout the clay.
5) Roll out clay with your hands. Use a sharp tipped knife and carve out the shapes of leaves and design them however you like. ( Ex: The leaves I created are shown in the pictures above!)
6) Leaves can be stores in an airtight container.

ENJOY!!!! :D


Me with the caramel sauce!

Me eating the caramel sauce! :D

Thursday, July 12, 2012

Orange Dream Cupcakes!

Orange Dream Cupcakes!

These cupcakes were absolutely delicious! The curd adds a nice tangy contrast to the sweetness of the vanilla buttercream frosting! 
This is after I hollowed out the middle.

I kept all of the hollowed out cake middles! :)

The cupcakes filled with orange curd!

My vanilla buttercream after it had been whipped the proper amount of minutes.

Me frosting the cupcakes using a Ziplock bag. :)

Intense Frosting. 

Orange Dream Cupcakes up close!

Me holding my creation!

The deliciousness is radiating off the cupcakes as a glow. :)
So, I haven't been posting on my blog as faithfully as I should! Last week was hectic because I was at camp, so I didn't have the chance to post! But, I'm back, and ready to resume my excessive baking of creative desserts! The other day I stopped by a gas station and immediately headed to the section devoted to their assortments of gum. I'm an avid gum chewer, and must be stocked with packs of gum at all times! As I was skimming over the different flavors of gum, I noticed a new Trident flavor labeled,  Orange Swirl. The title was accompanied with an image of an orange Dreamsicle! I absolutely adore the frozen treats, and purchased the gum immediately. As I was chewing the new gum, a new idea developed in my head. What about an Orange Dream Cupcake?! I immediately set off to work and delved into my plethora of cookbooks. I decided on making Orange Crush cupcakes, filled with a fruity orange curd, then topped off with a fluffy vanilla buttercream frosting. The final product is finished with a  candy mandarin orange slice for presentation and embellishment. ENJOY :)


Orange Dream Cupcakes
Orange Crush Cupcake:
-3 sticks of butter
-2 and 3/4 Cups of Sugar
-3 Cups of All-Purpose Flour
-1 Cup of Orange Crush Drink
-5 Eggs
-1 tsp. of Orange Flavoring

Orange Curd:
from Nick Malgieri's How to Bake
-1/2 cup of freshly squeezed juice from an orange, strained
-1/4 cup of freshly squeezed juice from a lemon, strained
-1 stick of unsalted butter
-3/4 cup of Sugar
-6 egg yolks

Vanilla Buttercream Frosting:
from Shelly Kaldunski's Cupcakes
- 3 egg whites
-3/4 cup of Sugar
- a dash of salt
- 1 tsp. of vanilla
- 2 sticks of unsalted butter at room temperature, cut into quarters.

***Candy Mandarin Orange Slices for garnish!!! :)***
To make the Orange Crush Cupcake...
*preheat oven to 325 degrees.
1) Cream the butter and sugar.
2) Add the eggs one at a time.
3) Add the flour and flavoring.
4) Add the Orange Crush drink.
5) Fill cupcake lined pan.

To make the Orange Curd...
1) Combine the butter, lemon juice, orange juice, and sugar in a sauce pan over low heat, bringing to a simmer. Stir occasionally. Be careful to make sure that your mixture does NOT come to a boil.
2) Whisk the egg yolks in a separate bowl.
3) Add about half of the simmering mixture into the egg yolks, and whisk together.
4) Return the egg yolk mixture to the hot saucepan, and continue to whisk.
5) Once the mixture is thickened, and you can leave a trail with your finger across the top, transfer mixture to a bowl.
6) Cover bowl with plastic wrap and allow to refrigerate for at least 3 hours. I made my curd in the morning and allowed it to refrigerate until around six o'clock, just to make sure it had a thick consistency! :)

To make the Vanilla Buttercream Frosting...
1) Whisk egg whites, salt, and sugar in a heatproof metal bowl over simmering water.
2) When the sugar has dissolved completely and the mixture is warm to the touch, remove from heat.
3) Beat on high on an electric mixture for ten minutes.
4) Add butter in portion, beating on high until very fluffy, shown in the picture above. 
5) Add vanilla.
6) Continue beating until very fluffy. 
(Making buttercream was very hard for me to master at first! I made it 13 times until it came out right, but it was worth it! Buttercream can be tricky to make, so I suggest using a stand mixer for the best results!)

To assemble your Orange Dream Cupcake....
1) Once cupcake has completely cooled, cut out center as shown above.
2) Spoon preferred amount of orange curd into the hole.
3) Scrape of any excess curd off the surface of the cupcake with a knife.
4) Ice your cupcake with frosting.
5) Top with your candy mandarin orange slice and ENJOY! :)